Brick backsplashes are currently becoming a popular feature in many of the modern kitchen designs. Installing one of them, however, is not a walk in the park, and thus some accurate preparation must be done to allow the owner to use these walls for a long time. They are meant to deal with the everyday splatter and spills that the kitchen sinks and ovens are exposed to, so you need to have them done the right way.
The right installation procedures will eventually save the owner a good amount of money and maintenance effort once the backsplash is up – if installation is done correctly. Here are some of the things you will need to know prior to the installation:
Check your options for the budget at hand
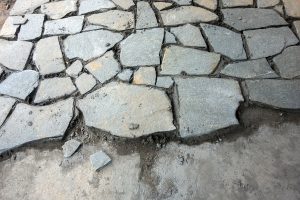
Two options exist when it comes to backsplashes in the market; solid and brick veneer types. Nothing will beat the solid brick types when it comes to durability and strength. However, for you to install such bricks, you will have to be set back up to $20 per square foot for purchase and installation. Solid bricks are also installed by laying single bricks over a pre-existing masonry foundation. Its insulation power is also not very high.
The other not-so-expensive and easy-to-install option involves the use of brick veneer; brick panels that are thin and interlock to provide the same feel as the solid brick type. Their advantage, apart from cost and ease of installation is their ability to adapt to a foundation of stone, metal or wood.
The toolset needs an update
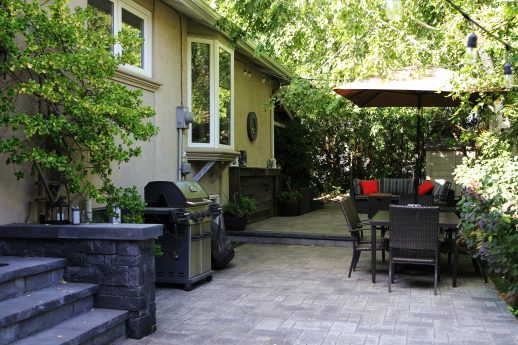
Whether you will be the one installing or you will be using the help of a professional who specializes in interlock installation in Richmond Hill, the bricks need to be worked by using the required tools, especially when fitting the bricks over an edge. They need to be cut prior to the installation. This requires the use of an angle grinder, fitted with a diamond-cutting toothless blade. The bricks are marked using a pencil after the required measurements are made after which the angle grinder works on the marked area. A mason’s hammer is then used to tap the excesses to snap the remains away.
Be smart while using the sealant
It is highly recommended that the installed backsplash be coated with a clear sealing agent. A satin or a matte finish will do quite well and will keep both air moisture and stains from different products used in the kitchen out. You will also keep stains from food oils and fumes from dirtying the wall. Choose clear silane or a siloxane-based type for the sealant. Do not go for silicate-based sealants. These tend to discolor the veneer.
Be cautious while cleaning the backsplash
You must be aware that cleaning the brick surface should not be down with excessive force. Doing so tends to erode the brick or discolor the surface. Though the bricks tend to leave a deep recess between individual interlocks (which allows for a grimy-buildup of dirt), you should not use a heavy hand over the dirt.
Instead, spray away the dust off the surface and use plain water on a spray bottle to clean out the loose dirt. For the persistent stains, prepare a paste using dish soap and salt and spread it across the dirty area. Brush off the area gently using a bristle brush. Never use a wire brush for cleaning the surface.
You may encounter efflorescence
Even with well-maintained backsplashes, once in a while, you may encounter some white material forming up right at the surface of the brick. This chalk powder-like substance appears as a result of a reaction between the mineral substances inside the brick and water or moisture.
To reduce its presence, you need to ensure that before installation, bricks do not get into contact with water. In addition, you must ensure the sealant used is adequately applied. When cracks or gaps appear on the brick surface, be sure to seal with enough silicone caulking. A mix of muriatic acid and a gallon of water is also used to make the white patches disappear.
Explore our recent brickwork projects to see what our specialists can do!


